Friday 3 April 2015

I'm back for Easter!

 
Well, well, well. For all my loyal followers and fans (I wish), though there are not many of you (if any) I'm sure those of you that do follow and read my humble blog have been wondering where I have been after I stated a turn around so so so long ago. Blame my university, it wasn't my fault I swear! Honestly, final year has had me writing so much that at the end of the day the last thing I want to do for fun is write some more adn stare at my laptop screen! I am sorry but I am back with big news...

The past few weeks I have been starting up a beautiful friendship and collab with some lovely girls in the states at GlossyFinds.com. They have formally asked me to feature in their new vlogger team with my nail art tutorial videos!

My first went up on St Patricks Day some time ago and the next will be going up tomorrow. If you are eager enough to have clicked on a tweet or facebook post (where I lovingly beg for readers) you will be one of the lucky few that gets to see the video before GF post it tomorrow for the Easter Weekend.

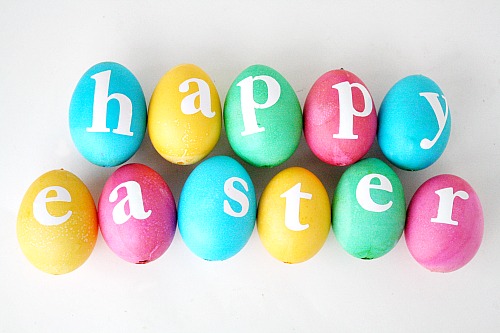
This design is simple for those of you just starting up with nail art, grab your brushes and pretty pastel polishes and get painting your bunnies and Easter eggs... Here is the live YouTube link, please subscribe to my channel here as well!...


Featured in this design (no PR samples), in order of appearance: GOSH Cosmetics Special Edition Nail Lacquer in Bright Idea, Maybelline Colour Show Bleached Neon Polish in Tropink, Models Own Polish in Feeling Blue, Avon Cosmetics Opal Top Coat, Miss Sporty Lasting Colour Polish in Clear, Rimmel London Pro Matte Finish Top Coat.
Tools in order of use: Thin painting brushes #000 & #00, Smallest dotting tool (needle also works for this), Masking Fluid by Terry Harrison (all purchased via eBay)

Wednesday 18 February 2015

My Julie/Julia Inspiration

Last night I accidentally fell upon the beautiful film Julie & Julia. If you haven't watched it.. Do. I don't really want to reiterate the story, so watch it instead. It really broke down blogging to me into a more meaningful thing. When I tell people I blog about beauty and nails they often question why I do it and the answer has always honestly been 'I don't know'. But it was actually because I was jobless and needed something to take my mind off my impending doom that was .. moving away from London and finishing my wonderful year at home with my parents, freedomless, penniless and missing the city I fell in love with. As soppy as all this sounds reading it back, I'm not going to delete it. Really it was just about doing something fun.

In the film the main charater Julie challenges herself, and I love challenges, another reason I took on this blog. I didn't do it to become the famous Zoella or Essie Button or Tanya Burr, hell no. But just to see if what I had to say was worth a damn.

I still don't think it is but it is really nice to vent every now and again about things I love.

And the fact is i love more than beauty products and nail art, I mean I'm not completely 1 dimensional.

So I am going to transform this blog, into something more 'lifestyle'. I study fashion so I'll talk about that, I live at home in a rut of student life with my parents, I am an auntie to two beautiful nieces, I love to bake (Mary Berry being my one and only) and I am above all a girl who just likes .. things. 

The next challenge I want to set myself is the Mary Berry Challenge. I got her Baking Bible for Christmas you see and I want to bake from it ALL the time. Only having attempted a few recipes so far I would like to challenge myself to work my way through her book.

I have no intended deadline so far but I would really love to do one recipe a fortnight (I mean I have a life... and am penniless, ingredients cost money you know!)

Watch this space for the first recipe... And more challenges to come! :)


Saturday 14 February 2015

how to be a single valentine

On Valentines Day I am always single.. And I actually love it that way. I devote the day of love to loving myself and allowing myself to be alone and pampered. This year is slightly different I am spending it with my best friend, white wine - and Juliette will be there too..

But if you are alone and the only valentine through your letterbox was from your grandad (or in my case friends mum!) then I have the perfect pamper plan for you.

After a long day in your red lippie, GOSH Cosmetics Velvet Touch Yours Forever (found here) (slightly ironic I know) it's time to wind down...


Start by running yourself a hot hot bubble bath using the stunning fragrances of this Laura Ashley Bath Soak (found here)

Once the bath is to your bubbly requirements, light a few Yankee Candles to add to the atmosphere of what will be your haven today (found here), I recommend this valentines special set with sweet strawberry, grapefruit and hibiscus scents and a gorgeous glass holder.


Now pour yourself a well deserved glass of wine and slink into the bath, lights down and relaxed.

Once you have started to soak as you should, this Argan Oil Hair Mask & Conditioning Treatment (found here) is perfect for treating your hair as you have treated the rest of you, while this softens each strand of your hair apply this lovely Aroma Actives Mask (found here) to make your skin glow just for you.

Now when you have pruned as much as you can handle use this Soap & Glory Righteous Body Butter (found here) to keep yourself velvetty and spritz yourself with I Love... Strawberries and Cream (found here) to cool down and keep sweet.


Now for my favourite part... your nails. Pop on your dressing gown and grab your favourite polish colours, perfect for valentines day I used Avon Real Red, Avon Viva Pink, Avon Pink Creme, GOSH Special Edition Holographic Hero and GOSH Frosted Soft Blue. Pick a design, mine from this year is below, and polish away...


Now kick back order your chinese takeway and stick your fave scary film on!

Happy single valentines day xxx

Saturday 31 January 2015

paisley video tutorial


Paisley is the first design I did with my original Rio Nail art pens, I now use a very thin design brush and dotting tool. For this particular sweet pink design (perfect for valentines day) I used Avon Pink Creme Nail Enamel and B. Complete Red Nail Polish, I topped it off with Cheeky's Matte Polish.
Please like, love or hate my YouTube video and subscribe or unsubscribe to my channel here.
Good Luck ladies.

Saturday 24 January 2015

'Avon it

Another one of my presents Santa left under the tree, an Avon Selection Box. This was a gift I spotted on Instgram and instantly sent the picture to my mum, subtle hint, and it worked. She emailled Santa and there it was.. 12 stunning nail enamels.


I didn't own many Avon polishes before I got this Selection Box (just my Opal glitter that I adore) but my mum has had them in the past. I am so happy with the quality of the polishes, I've only ever heard good things about these enamels so I wasn't surprised, just happy! The colours I got were quite varied, including another Opal polish (never can have too many), 2 Gel Finish polishes in a pale pink and red that again are really good quality polishes.

 My favourite is so hard to choose! I love the pale pink Gel Finish P805 Sheer Love because it is perfect to use as a base for my nail art, but I also love my classic Real Red Nail Enamel. It's so hard to choose a favourite.. I cannot do it.

One thing I would say against this selection box is that there are a few polishes I won't use, like perfectly flesh and romance and maybe coral reef. If Avon continue the selection boxes next year (which they should!) I would advise making them more tailored. For example, soft and sweet with pinks and light colours; glitter me happy with glitters and metallics; bright and bubbly with brights, neons and stand out polishes; mix and match with completely random polishes. That is what I would do!

Here are the swatch pics I took:
Coral Reef

Opal - Opalesce (on top of Real Red below)

Real Red

Decadance

Viva Pink

Perfectly Flesh

Pink Creme

Romance

Golden Vision

  Sea Breeze


Thursday 15 January 2015

denim transformation

 For years I have struggled with jeans. From being too skint to by nice Toshop jeans that actually fit my length of leg I have had my fair share of Primark jeans as they have the best length availability for the price! But the only problem is they are pretty ugly...

The best pair of jeans I have ever owned are a super tight acid wash high waist jeans from Topshop... Unfortunately I have stretched them out and worn them out to the point of no return, unless I put a stone of two on (lets be honest that's not likely to happen just for a pair of jeans). And now I am in a total money rut being slung back into student life full force I have been forced to turn back to Primark jeans to get me through these very very cold months.

A few years ago, in the very same position, I purchased a standard pair of blue skinny (not that skinny) low waist jeans from Primark and I dipped the ends in bleach to vamp them up a bit. Many compliments later I want to do the same with a similar pair I've had for a few months now and actually hate wearing because they are so blah. And they also are way too big around the ankle.

So here is what I have done step by step to tailor them and jazz them up..
  1. I grabbed a pair of rubber gloves, an empty spray bottle and a bottle of bleach I found in the cupboard
  2. I lay the jeans in the bath tub and with a spray bottle filled with pure bleach I sprayed away to my own pleasure.
  3. I then hung the jeans on the door to allow to dry, then I could see if I had sprayed them enough.
  4. Once happy, I put them in the drier to make super sure they were right.
  5. Now the complicated bit that I've taken snaps for...
  6. I took the in seam of the jean and pinned it to the size of my ankle
  7. Next I removed the jeans and cut a V to remove the old seam
  8. I did a very simple overlay stitch around the edge of the jeans to keep them in place. Do try to make sure the seam looks moderately presentable as we are going to fold them up next.
  9. So once the stitch us done, fold the jeans a do a simple stitch inside the fold to keep in place on either side.
  10. Repeat on the other leg.
  11. Now wash the jeans to make sure the bleach is out and the stitches are stable enough.
  12. Dry and add a belt if you like. Et voila. 

Sunday 11 January 2015

Baked (like golden bread) by Urban Decay

Always being a make-up lover, when it came to my best friend buying me a little present for Christmas, it was really quite easy to pick something.

My first Urban Decay shadow... I was so excited.


It is the most beautiful golden shimmer named Baked. It reminds me of golden baked bread that my dad makes.

When I went to apply it I wasn't sure the style of look I would go for so I used my MUA brown trio palette to create a nice base and contour and highlight my brow bone. I then applied this stunning shimmer to the lid. I decided it reminded me of Arabian nights looks I've seen on Sex and the City 2 and Instagram, so I teamed it with a thick black cat eye eyeliner and applied my Avon liquid look eyeliner pencil to my lower waterline, something I never do! To complete the look I used my GOSH forever shadow stick in Bronze to add shimmer to my browbone and under my waterline.

This was the result...


Once I teamed this with a brown lippy of my mums from the 90s I had my new fave look!


 This shadow is available online here... Urban Decay Eyeshadow Single in Baked.